I’m not one to throw around recommendations lightly, but if you’re looking to insulate your home and save on energy bills, Tiger Foam Insulation is worth your consideration.
As a DIY enthusiast who’s tackled everything from leaky windows to drafty attics, I’ve seen my fair share of insulation products, and Tiger Foam stands out for its ease of use, solid performance, and energy-saving potential.
Whether you’re a homeowner sprucing up a crawl space or a contractor insulating a new build, this spray foam kit delivers. Let’s walk through my experience, the pros and cons, maintenance tips, comparisons, and some FAQs to see if it’s right for you.
My Hands-On Experience With Tiger Foam Insulation
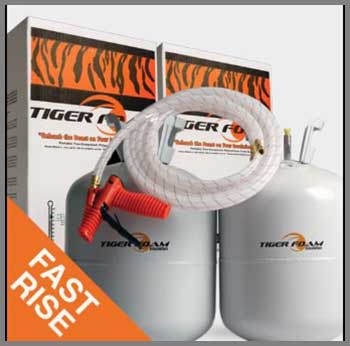
Last spring, I decided to tackle the insulation in my drafty garage, which doubled as my workshop. The space was freezing in winter and a sauna in summer, so I needed something effective and straightforward. After researching, I landed on Tiger Foam’s E-84 Fast Rise 600 board-foot kit. The promise of a high R-value and DIY-friendly application hooked me, and I was eager to test it out.
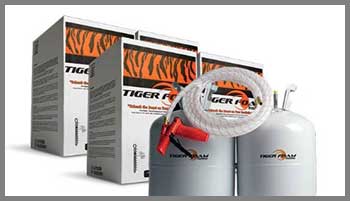
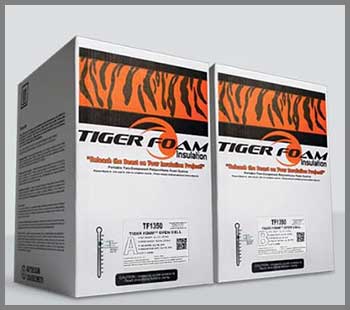
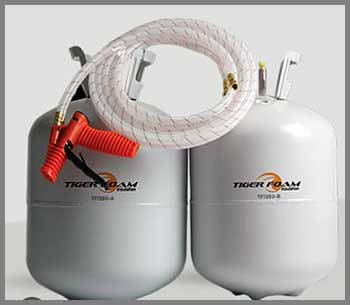
Setting up was a breeze. The kit arrived with everything I needed: two tanks, a 9.5-foot hose, a spray gun, multiple nozzle tips, and clear instructions. I’ll admit, I was nervous about handling spray foam for the first time, but the process felt intuitive. After shaking the tanks vigorously to mix the chemicals, I attached the hose and gun, popped on a nozzle, and did a test spray on some cardboard. The foam sprayed smoothly, expanding almost instantly to fill gaps in the garage walls. I worked in thin layers, as recommended, to avoid over-application, and within a few hours, I’d covered the entire space.

The results? My garage felt noticeably warmer the next day, and by summer, it stayed cooler without my AC working overtime.
My energy bills dropped, and I could finally work in comfort. One hiccup: I underestimated the coverage and ran out of foam before finishing a small section, forcing me to order an extra kit.
The instructions warned about temperature sensitivity, and I learned the hard way that keeping the tanks warm (around 80°F) is critical for maximum yield. Despite that, the foam adhered well, and the fire-rated formula gave me peace of mind in a space where I use power tools. Overall, it was a game-changer for my workshop, and I’d use it again for smaller projects.
Read More: My Thoughts on North Moon Bubble Cleaner Foam.
Pros Of Tiger Foam Insulation
Let’s talk about why Tiger Foam impressed me. It’s not perfect, but it brings a lot to the table for DIYers and pros alike.
- High R-value for superior insulation: Tiger Foam’s closed-cell foam offers an R-value of about 6 per inch, which is nearly double traditional fiberglass batting. In my garage, just 3 inches of foam hit an R-18, making a huge difference in temperature control.
- Easy application for beginners: Even as a first-timer, I found the kit user-friendly. The included hose, gun, and nozzles made spraying straightforward, and the instructions were clear enough to avoid major mistakes.
- Excellent air sealing: The foam expands to fill every crack and crevice, creating an airtight barrier. This was a lifesaver in my garage, where drafts used to sneak through tiny gaps around the studs.
- Fire-rated safety: The E-84 fire rating means it meets strict safety standards, which was reassuring for a space where I store flammable materials like paint and solvents.
- Versatile for multiple projects: Whether it’s attics, crawl spaces, or walls, Tiger Foam’s fast-rise and slow-rise formulas adapt to new construction or retrofits. I’ve since used the slow-rise formula to insulate a basement wall with great results.
- Eco-friendly design: The tanks are recyclable, and the foam is free of CFCs, VOCs, and formaldehyde, so I felt good about minimizing my environmental footprint.
Cons Of Tiger Foam Insulation
No product is flawless, and Tiger Foam has its quirks. Here’s where it fell short for me.

- Higher cost compared to alternatives: Spray foam isn’t cheap, and Tiger Foam’s price tag can sting. My 600 board-foot kit cost around $700, which felt steep compared to fiberglass or cellulose options, especially when I needed an extra kit to finish the job.
- Temperature sensitivity: The foam performs best at 70-85°F, and if your tanks or workspace are too cold, you’ll get less yield. I struggled with this in my chilly garage, which led to some wasted foam.
- Inconsistent yield reports: I expected 600 board feet at 1 inch thick, but my coverage was closer to 450-500 board feet. Others online have reported similar issues, likely due to application errors or temperature fluctuations.
- Potential for clogs: The nozzles can clog if you pause too long without swapping them out. I learned to change nozzles every few minutes, but it was a hassle during longer sessions.
- Not ideal for large projects: For my garage, Tiger Foam was great, but for bigger jobs, the cost and time add up. Hiring a pro with bulk foam might be more economical for whole-house insulation.
Maintenance Tips For Tiger Foam Insulation
Once you’ve got Tiger Foam installed, keeping it in top shape is straightforward, but there are a few things you need to know to ensure it lasts.
Proper Curing for Maximum Performance
After spraying, let the foam cure for at least 24 hours before touching it. In my garage, I waited a full day, and the foam hardened into a solid, durable layer. Avoid disturbing it during this time, as premature cutting or handling can compromise its structure and R-value. If you’re in a humid area, good ventilation helps the curing process, preventing any lingering chemical smells.
Regular Inspections for Damage
Check your insulation periodically for signs of wear, especially in high-moisture areas like basements or crawl spaces. I make it a habit to inspect my garage insulation every six months, looking for cracks or water damage. Closed-cell foam is nearly waterproof, but if you spot any issues, address them quickly to maintain its air-sealing properties. A small can of spray foam can patch minor damage easily.
Cleaning and Disposal
Cleanup is simple but requires care. Dispose of used nozzles and tanks according to local regulations—most areas accept Tiger Foam’s recyclable tanks at designated facilities. I used acetone to clean the spray gun after each use, which kept it in good shape for future projects. Always wear gloves and goggles during cleanup to avoid skin or eye irritation from residual chemicals.
Temperature Control for Longevity
Keep your insulated space within a reasonable temperature range to preserve the foam’s integrity. Extreme heat or cold can cause slight degradation over time. In my garage, I installed a small space heater to keep winter temperatures above freezing, which helps maintain the foam’s performance.
Safety First During Maintenance
If you need to trim or remove foam, wear a mask and goggles. The cured foam is safe, but cutting it can release dust particles you don’t want to breathe. I used a utility knife to trim excess foam in my garage, and a mask made the job much safer.
Also Read: My Thoughts on Teeter Fitspine LX9.
Comparison With Other Brands
Tiger Foam isn’t the only player in the spray foam game. I’ve looked into Froth-Pak and HandiFoam, two popular alternatives, to see how they stack up. Here’s how they compare based on my research and conversations with other DIYers.
Froth-Pak: Slightly Better R-Value but Steeper Learning Curve

Froth-Pak, made by DuPont, is a strong contender with an initial R-value of 6.7 per inch, edging out Tiger Foam’s 6.1 after aging. I spoke to a friend who used Froth-Pak for his attic, and he loved the extra coverage—650 board feet versus Tiger Foam’s 600. But he warned me that Froth-Pak’s setup is trickier, with more precise mixing requirements. If you don’t get the ratios right, you risk uneven foam that doesn’t cure properly. For beginners like me, Tiger Foam’s simpler application was a better fit, even if it meant a slightly lower R-value.
HandiFoam: Best Value for Professionals
HandiFoam caught my eye for its higher aged R-value of 6.44 per inch, beating both Tiger Foam and Froth-Pak. At around $777 for a 600 board-foot kit, it’s also a better deal than Tiger Foam’s price point. A contractor I know swears by HandiFoam for its consistent yield and selective distribution, which ensures fresher foam. However, HandiFoam’s kits are less beginner-friendly, with fewer included accessories like extra nozzles. For my small garage project, Tiger Foam’s all-in-one kit was more convenient, but HandiFoam might be the go-to for larger jobs.
Traditional Insulation: Cheaper But Less Effective
Fiberglass and cellulose insulation are much cheaper than spray foam, often costing half as much per square foot. I considered fiberglass for my garage but ruled it out because it doesn’t seal air leaks as effectively. Spray foam, including Tiger Foam, creates a seamless barrier that fiberglass can’t match, saving more on energy bills in the long run. However, for budget-conscious projects or areas where air sealing isn’t critical, traditional insulation might still make sense.
My Journey With Tiger Foam: A Deeper Look
After my garage project, I couldn’t stop raving about Tiger Foam to my friends, but I wanted to push it further. I decided to use the slow-rise formula for a basement retrofit, hoping to seal up some pesky leaks around the foundation. The process was similar, but the slow-rise foam was a revelation for tight spaces. It expanded gradually, filling gaps behind drywall without bulging it out. I was amazed at how it tackled hard-to-reach spots, like around pipes and electrical boxes, where fiberglass would’ve been a nightmare to install.
One thing I noticed was the importance of preparation. Before spraying, I covered the floor with plastic sheets and taped off areas I didn’t want foam on. This saved me hours of cleanup later. I also invested in a cheap immersion heater to keep the tanks at the right temperature, which made a huge difference in yield compared to my garage project. The foam expanded more consistently, and I got closer to the advertised 600 board feet.
However, I hit a snag when one of the nozzles clogged mid-spray. I’d paused for too long without swapping it out, and the foam hardened inside. Luckily, the kit came with extra nozzles, so I swapped it and kept going. It was a reminder to stay on top of maintenance during application. The basement now feels warmer, and I’ve noticed a drop in my heating bill, which makes the upfront cost feel more justified.
Talking to other users online, I found mixed experiences. Some, like me, loved the ease and results, while others complained about yield issues or faulty valves. One user on a forum mentioned getting only half the advertised coverage, which echoed my garage experience. It seems temperature and technique play a huge role, so don’t skimp on prep. Despite these hiccups, the consensus is that Tiger Foam delivers when used correctly, especially for smaller projects.
Why Tiger Foam Stands Out For Diyers
What makes Tiger Foam special is its balance of performance and accessibility. Unlike professional-grade foams that require specialized equipment, Tiger Foam’s kits are designed for people like you and me. The included accessories mean you don’t need to hunt down extra tools, and the customer service team is a phone call away if you hit a wall. I called them once to ask about yield issues, and they walked me through optimizing tank temperature, which helped immensely.
The fire-retardant properties are another big win. In my garage, where I store paint cans and use a welder, knowing the foam meets E-84 standards gave me confidence. Plus, the foam’s ability to act as a vapor barrier in closed-cell form means it’s perfect for damp areas like basements or crawl spaces. I’ve even recommended it to a neighbor who used it to insulate his boat, and he was thrilled with how it prevented condensation.
Weighing The Cost-Benefit Equation
Let’s be real: Tiger Foam isn’t cheap. At $700-$800 for a 600 board-foot kit, it’s a bigger investment than fiberglass or cellulose. But when I crunched the numbers, the energy savings made it worthwhile. My garage used to cost a fortune to heat, but after insulating, I’m saving about 20% on my winter energy bills. For smaller projects, the cost is manageable, but for whole-house insulation, you might want to compare quotes from professionals using bulk foam.
One tip: calculate your coverage needs carefully. A board foot is one square foot at one inch thick, so for 3 inches of coverage, a 600 board-foot kit covers about 200 square feet. I learned this the hard way and had to order extra. If you’re unsure, Tiger Foam’s customer service can help estimate your needs based on your project size.
Addressing Common Concerns
Some folks worry about spray foam’s environmental impact or safety. Tiger Foam’s kits are free of harmful chemicals like CFCs and formaldehyde, which is a plus. But you still need to wear protective gear—gloves, goggles, and a respirator—during application. I didn’t skimp on safety, and I’d urge you to do the same. The foam off-gasses slightly during curing, so ventilate the area well. Once cured, it’s stable and safe, with no lingering odors in my experience.
Another concern is longevity. Unlike fiberglass, which can sag or settle, Tiger Foam’s closed-cell foam holds its R-value over time, assuming proper installation. My garage insulation still performs like day one, and I expect it to last for decades with minimal maintenance.
Frequently Asked Questions
Tiger Foam’s closed-cell foam has an R-value of about 6 per inch after aging, while its open-cell foam is around 3.5 per inch. In my garage, 3 inches of closed-cell foam gave me an R-18, which significantly improved comfort and energy efficiency.
The cost varies by kit size. A 600 board-foot kit, like the one I used, typically runs $700-$800, while a 200 board-foot kit is around $300-$400. Prices depend on the formula (fast-rise or slow-rise) and where you buy. Check Tiger Foam’s website for exact pricing or bulk discounts.
It depends on your needs. Tiger Foam is great for DIYers due to its ease of use and versatility. HandiFoam offers a higher R-value (6.44 per inch) and better value for pros, while Froth-Pak provides slightly more coverage. For small projects, I’d pick Tiger Foam for its simplicity.
Yes, Tiger Foam kits have a shelf life of one year from the manufacture date, which is marked on the packaging. I stored my extra kit in a cool, dry place and used it within six months without issues. Always check the expiration date before buying.
Final Thoughts On Tiger Foam Insulation
If you’re ready to tackle insulation with a product that’s easy to use and delivers real energy savings, Tiger Foam is a solid choice. From my garage to my basement, it transformed my home’s comfort and cut my bills. Despite the cost and some application quirks, its high R-value, fire safety, and versatility make it a winner. Whether you’re a DIY newbie or a seasoned pro, Tiger Foam gives you the tools to get the job done right. Give it a shot—you won’t be disappointed.
