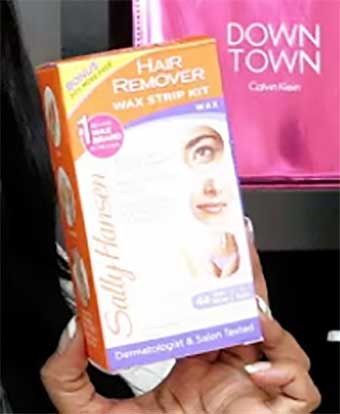
If you’re tired of pesky facial hair stealing your glow, grab Sally Hansen Hair Remover Wax Strip Kit for Face, Brows & Bikini. These pre-waxed strips transformed my routine, leaving my skin smooth for weeks.
Affordable, mess-free, and perfect for short hair, they’re a home-waxing dream. Whether it’s your brows or bikini line, you’ll love the salon-like results.
Buy them now, and take control of your hair removal game—your confidence will thank you
My Journey With Sally Hansen Wax Strips
Let me paint you a picture: I’m staring in the mirror, annoyed at the fuzzy peach fuzz above my lip and the stray hairs creeping beyond my brows. Shaving left stubble, and salon waxing was too pricey and time-consuming. Enter Sally Hansen Wax Strips, my at-home savior. I picked up a box at Walmart for about $6, hoping for an easy fix. Spoiler alert: they delivered! After a quick rub between my hands, a swift pull, and a dab of azulene oil, my skin was baby-smooth. These strips have been my go-to for years, and I’m not alone—other users rave about their convenience and results.
Why Sally Hansen Wax Strips Are A Game-Changer?
Sally Hansen Wax Strips are like having a mini salon in your bathroom. Here’s why they’ve earned a permanent spot in my beauty stash and why you’ll probably love them too.
- No Prep Needed: Pre-waxed strips are ready to go—no microwave or messy pots. I just grab a strip and get to work.
- Works on Short Hair: They grip hair as short as 1/4 inch. My fine facial hair doesn’t stand a chance.
- Multiple Sizes: Small, medium, and large strips fit brows, lips, or bikini areas. I use small ones for precise brow shaping.
- Long-Lasting Results: Hair stays gone for up to 6 weeks. My upper lip stays smooth for nearly a month.
- Affordable Price: At $5-7, it’s a steal compared to $15 salon visits. My wallet’s happy, and so am I.
- Mess-Free: No gooey wax spills or sticky cleanup. The included oil wipes away residue in seconds.
- Portable: Thin strips fit in my purse or travel bag. I’ve waxed on the go during trips!
- Reduces Regrowth: Regular use thins out hair over time. My brows need less maintenance now.
- Easy to Use: Rub, press, pull—done! Even waxing newbies like my sister nailed it on the first try.
- Minimal Irritation: The azulene oil soothes skin fast. My sensitive skin barely gets red.
These strips make waxing quick, cheap, and effective. They’re perfect for busy folks who want smooth skin without the fuss.
Also read:My Final Thoughts Orliani Glow Reveal
The Downsides: Where Sally Hansen Wax Strips Miss The Mark
Nothing’s perfect, and Sally Hansen Wax Strips have their quirks. Here’s the real talk on what bugged me, so you’re not caught off guard.
- Not for Coarse Hair: Thick hair may need multiple strips or tweezing. My bikini area required extra effort.
- Sticky Residue: Some wax can linger, needing oil and scrubbing. I had to wash my face twice once.
- Sensitive Skin Risk: Redness or bumps can hit sensitive types. My friend got irritated for a day.
- Learning Curve: Pulling too slowly leaves wax behind. My first try was patchy until I got the technique.
- Small Strips Only: No large strips for legs or arms. I needed a different kit for bigger areas.
- Pain Factor: Waxing stings, especially on the bikini line. I brace myself for a quick ouch.
- Stragglers Left Behind: Fine hairs sometimes stay put. I keep tweezers handy for cleanup.
- Oil Can Irritate: The finishing oil caused a breakout for my oily-skinned cousin. Wash it off quickly.
- Not Reusable: One strip, one use—unlike sugaring. I go through strips faster than I’d like.
- Tricky Brow Underside: Shaping under brows is tough with square strips. I cut them for precision.
These cons aren’t deal-breakers for me, but they’re worth noting. Test on a small patch first to avoid surprises.
How To Get The Most Out Of Sally Hansen Wax Strips
To make these strips work like a charm, I’ve got some tricks from my years of use. Follow these, and you’ll be a waxing pro in no time.
- Clean Skin First: Wash and dry your skin to remove oils. I use an alcohol wipe for extra grip.
- Warm the Strip: Rub between your hands for 10 seconds to soften wax. It sticks better to hair this way.
- Press Firmly: Smooth the strip in the direction of hair growth. I press hard to ensure every hair’s caught.
- Pull Fast: Yank the strip off quickly against hair growth. I hold my skin taut for less pain.
- Use Oil Promptly: Dab azulene oil to remove wax residue. I follow with a gentle cleanser to avoid irritation.
- Don’t Rewax: Tweeze stray hairs instead of rewaxing. I learned the hard way—rewaxing hurt my skin.
- Exfoliate Later: Wait 48 hours, then exfoliate to prevent ingrown hairs. I use a gentle scrub weekly.
- Store Properly: Keep strips in a cool, dry place. My bathroom cabinet keeps them fresh.
- Cut for Precision: Trim strips for small areas like brows. I shape them for tricky spots.
- Avoid Retinol: Skip retinoids for a week before waxing. My dermatologist warned me about skin fragility.
These tips turned me into a waxing wizard. Practice makes perfect, so don’t stress if your first go isn’t flawless.
Also read:My Final Thoughts Billie Wax Strips
Sally Hansen Wax Strips Vs. Other Brands: How They Stack Up
With so many waxing options, do Sally Hansen strips really shine? I compared them to Veet, Parissa, and Bliss to see how they measure up.
Sally Hansen Vs. Veet Ready-To-Use Wax Strips
- Ingredients: Sally Hansen uses glyceryl rosinate; Veet adds vitamin E and almond oil. Veet’s moisturizing perks are nice but not essential.
- Form: Both offer pre-waxed strips, but Veet’s are larger for body use. Sally Hansen’s sizes suit my face better.
- Price: Sally Hansen’s $6 vs. Veet’s $8-10. Sally Hansen saves me a few bucks.
- Effectiveness: Sally Hansen grabs short hair; Veet’s better for legs. My upper lip prefers Sally Hansen.
- Ease of Use: Both are simple, but Sally Hansen’s oil is more effective at residue removal. Veet left me stickier.
- Availability: Both are at drugstores and Amazon. Sally Hansen’s easier to find in smaller packs.
- Pain: Veet’s strips feel gentler on my legs. Sally Hansen stings more on sensitive areas.
- Longevity: Both last 4-6 weeks. My brows stay tidy equally long with either.
- Irritation: Veet’s oils reduce redness better. Sally Hansen’s oil works, but I wash it off fast.
- Target Area: Sally Hansen’s for face/bikini; Veet’s for body. I stick to Sally Hansen for precision.
Verdict: Sally Hansen wins for face and affordability; Veet’s ideal for larger body areas.
Sally Hansen Vs. Parissa Wax Strips
- Ingredients: Sally Hansen’s wax is synthetic; Parissa uses natural beeswax. Parissa’s eco-friendly vibe suits some friends.
- Form: Both have pre-cut strips, but Parissa’s are stiffer. Sally Hansen’s flexible paper molds better.
- Price: Parissa’s $10 vs. Sally Hansen’s $6. Sally Hansen’s budget-friendly for frequent use.
- Effectiveness: Sally Hansen grabs fine hair; Parissa struggles with short hair. My lip hair needs Sally Hansen.
- Ease of Use: Sally Hansen’s no-prep strips are quicker. Parissa’s need more warming time.
- Availability: Sally Hansen’s everywhere; Parissa’s at specialty stores. I grab Sally Hansen at Target.
- Pain: Parissa’s natural wax feels less harsh. Sally Hansen’s sting is sharper but bearable.
- Longevity: Both keep hair away for 4-6 weeks. No difference for my brows.
- Irritation: Parissa’s natural formula irritated my friend less. Sally Hansen’s fine for me if I cleanse after.
- Target Area: Parissa’s for face/body; Sally Hansen’s face-focused. Sally Hansen’s my pick for brows.
Verdict: Sally Hansen’s ease and price win; Parissa’s great for natural-ingredient fans.
Sally Hansen Vs. Bliss Poetic Waxing Kit
- Ingredients: Sally Hansen’s wax is pre-applied; Bliss uses microwavable wax with chamomile. Bliss feels fancier but messier.
- Form: Sally Hansen’s strips vs. Bliss’s pot-and-spatula setup. Strips are way less hassle.
- Price: Bliss’s $20 vs. Sally Hansen’s $6. Sally Hansen’s a steal for quick fixes.
- Effectiveness: Bliss grabs coarse hair better; Sally Hansen’s fine for my fine fuzz. Bliss won for my bikini line.
- Ease of Use: Sally Hansen’s grab-and-go vs. Bliss’s heating process. Strips save me time.
- Availability: Both at drugstores, but Bliss is pricier online. Sally Hansen’s more accessible.
- Pain: Bliss’s warm wax hurts less. Sally Hansen’s cold wax stings more on sensitive spots.
- Longevity: Bliss lasts slightly longer (6-8 weeks). Sally Hansen’s close at 6 weeks.
- Irritation: Bliss’s chamomile soothes better. Sally Hansen’s oil works but needs quick washing.
- Target Area: Bliss is all-over; Sally Hansen’s face/bikini. I prefer strips for small areas.
Verdict: Sally Hansen’s simplicity wins for face; Bliss is better for coarse hair and body.
Frequently Asked Questions (FAQ)
Results last 4-6 weeks, depending on your hair growth. My upper lip stays smooth for about a month, while brows need touch-ups by week 5. Regular use thins regrowth, stretching time between waxes. Exfoliating helps maintain smoothness longer.
Clean and dry skin, then rub the strip between your hands for 10 seconds. Peel apart, press firmly in the direction of hair growth, hold skin taut, and pull quickly against growth. Apply azulene oil to remove residue. Tweeze stragglers, don’t rewax.
Sally Hansen strips work for bikini areas but may struggle with coarse pubic hair. I found them effective for tidying edges, though they sting and may leave stragglers. For full pubic waxing, a professional or Bliss’s warm wax might be better to avoid irritation.
Why You Need Sally Hansen Wax Strips In Your Life
Sally Hansen Wax Strips are my secret weapon for smooth, hair-free skin without breaking the bank.
They’re easy, affordable, and deliver salon-worthy results at home. From my brows to my bikini line, these strips keep me confident for weeks.
Grab a box, follow my tips, and enjoy the freedom of fuzz-free skin. Your mirror—and your wallet—will thank you!