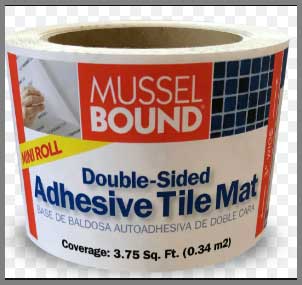
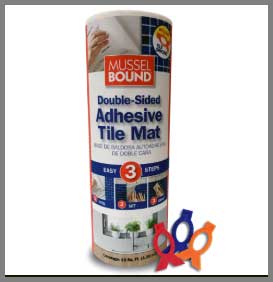
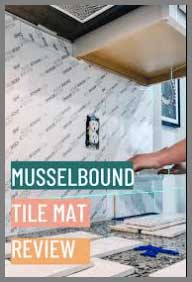
If you’ve been dreaming of a new tile backsplash but the thought of mixing thinset mortar, making a huge mess, and racing against the clock has you paralyzed, I need you to listen. I was in the exact same boat. Then I found MusselBound, and it changed everything. If you are a DIY-er who wants a professional-looking tile job in a single afternoon, without the mess and stress of traditional methods, you should absolutely buy this product. It’s the “easy button” for tiling I always wished for, and it actually works.
My Experience With Musselbound Adhesive Tile Mat

Let me set the scene. My kitchen backsplash was a boring, builder-grade beige paint.
I desperately wanted a classic white subway tile backsplash, but the entire process of tiling intimidated me.
I’m a weekend DIY-er, and my patience for large, messy projects is thin.
The idea of mixing mortar to the right “peanut butter” consistency, slopping it on the wall, and having it dry too fast or having tiles slide down was my personal nightmare.
I researched for weeks until I stumbled upon a video of someone just… rolling out a mat and sticking tiles to it. It looked too good to be true. That product was MusselBound.
I bought a roll, still deeply skeptical. I spent an entire morning just prepping my wall, which I cannot stress enough is the most important part. I cleaned it with TSP, lightly sanded it to scuff up the paint, and then wiped it down three more times until my cloth came back perfectly clean. I was ready. Unrolling the MusselBound mat was easy. It felt like a giant, high-tech roll of double-sided tape. I cut it with a utility knife and pressed it onto the wall, using a grout float to apply firm, even pressure, just as the instructions said. So far, so good.
Then came the moment of truth. I peeled back the front liner, exposing the grid of white adhesive. I picked up my first tile, lined it up carefully, and… thwack. The instant that tile touched the mat, it was on. There was no wiggle room. No “sliding it into place.” My first tile was slightly crooked, and my heart sank. I tried to pry it off, and it was immediately clear that the mat or my drywall was coming with it. I decided a slightly crooked first tile was part of the “charm” and moved on. From that point, I learned. I placed each tile with 100% commitment. The process was incredibly fast. I did my entire 18-square-foot backsplash in about two hours. The best part? I was able to grout immediately. By dinner, my kitchen was transformed. It was clean, fast, and the bond was rock-solid.
Also read: My Thoughts on Matrixx Water Softener
Pros Of Musselbound Adhesive Tile Mat
- The “No-Mess” Factor Is Real: This is, without a doubt, the number one reason to buy this product. Tiling with traditional thinset mortar is a famously messy job. You have dust from the powder, messy buckets, water, and the constant drip of mortar on your counters and floors. With MusselBound, there is zero mixing, zero water, and zero “mud.” My cleanup consisted of rolling up the paper backings and putting them in the trash. That’s it. My kitchen was perfectly clean the entire time.
- It Is Unbelievably Fast: A traditional tile job is a multi-day process. You mix and apply mortar, set the tile, and then you must wait 24 hours for the mortar to cure before you can even think about grouting. With MusselBound, the bond is instant. The moment you press that last tile onto the mat, you can immediately start grouting. I completed my entire project, from setting the first tile to buffing the last bit of grout haze, in a single afternoon.
- Incredibly Beginner-Friendly: If you can apply a sticker, you can use MusselBound. It completely removes the steepest learning curves of tiling: mixing mortar to the correct consistency and applying it evenly with a notched trowel. You just roll out the mat, cut it with a utility knife, and press it to the wall. It’s an instant, perfectly-even bed of adhesive every single time. It even comes with a few tile spacers in the roll.
- The Bond Is Ferociously Strong: I was worried this would feel like “craft glue” and that my tiles would start to peel off in a week. I was wrong. This adhesive is aggressive. Once you press a tile onto the mat with firm pressure, it is not going anywhere. I’ve had my backsplash for over a year now, through steamy pasta nights and vigorous scrubbing behind the sink, and not a single tile has budged. It feels as solid as any mortar-set tile I’ve ever felt.
- You Can Stop And Start (Within Reason): With a bucket of mortar, you’re on the clock. Once it’s mixed, you have to use it, or it turns into a rock. With MusselBound, you can work at your own pace. You only peel back the front liner of the area you’re ready to tile. I was able to take a coffee break, answer the phone, and let the dog out without any stress. The mat’s adhesive is ready when you are. The only caveat is that the manufacturer recommends you grout within 24 hours, so you can’t leave the tiles ungrouted for a week.
Cons Of Musselbound Adhesive Tile Mat

The Adhesion Is Unforgiving
- There Is Zero Repositioning: I am not exaggerating. The moment your tile touches the mat, it is permanent. You cannot slide it “just a little” to the left. You can’t adjust it. If you put a tile on crooked, you have two choices: live with a crooked tile or begin a destructive removal process that will pull the mat and your drywall off the wall. This is not for the indecisive. You must be precise and committed to every single tile placement.
- Wall Preparation Is Not A Suggestion: This adhesive is only as strong as the surface it’s stuck to. Your wall must be perfectly clean, smooth, and dry. I’m talking surgically clean. Any amount of drywall dust, grease, or even a slightly damp spot will compromise the bond and the mat will fail to stick to the wall. You will end up spending more time on wall prep than you do on tiling, but it is 100% necessary.
It Has Very Specific Limitations
- You Cannot Use Wet Tiles: This was a huge pain point for me. I used a wet saw to cut my tiles for the outlets and edges. You cannot take a tile directly from the saw and stick it to the mat. The moisture will instantly neutralize the adhesive, and it will not stick. I had to create a “drying station” where I would cut a batch of tiles, then use a hair dryer to get them bone-dry before I could place them. This added a significant and annoying extra step to the process.
- It Is Expensive: A single roll of MusselBound is significantly more expensive than a bag of thinset mortar that covers the same area. You are paying a very high premium for the convenience, speed, and clean-up. For a small backsplash, the cost difference was worth it to me. For a large shower wall? The cost would add up incredibly fast and mortar would be dramatically cheaper.
- It Is Not For Floors: This product is for vertical surfaces (and countertops) only. It is not engineered to withstand the foot traffic and different stresses of a floor installation. Do not use it on floors, period.
Maintenance Tips For Musselbound Adhesive Tile Mat
Tips For A Perfect Installation
- Become A Dry-Fit Master: Since you only get one shot at placing each tile, you must plan your layout perfectly. I recommend laying out your entire backsplash on the counter or floor first. Place your tiles, use your spacers, and see exactly where your cuts will need to be. This ensures you know what you’re doing before you expose that sticky adhesive.
- Treat Wall Prep Like A Surgeon: I said it in the cons, but it’s the most important maintenance tip. Clean the wall with a degreaser like TSP. If your wall is glossy, you must sand it to give the mat’s adhesive something to bite into. After sanding, wipe it down with a damp cloth, let it dry, and then wipe it down again with a dry microfiber cloth to remove every last particle of dust.
- Use A Grout Float To Press The Mat: Do not just use your hands to press the mat onto the wall. Your hands don’t provide even pressure, and you’ll create weak spots. Use a grout float or a J-roller and apply firm, even pressure over every single square inch of the mat. This activates the pressure-sensitive adhesive and ensures a permanent bond to your wall.
- Lubricate Your Cutting Tools: The adhesive on this mat will gum up your utility knife or scissors very quickly, making it a sticky, frustrating mess to cut. Keep a small rag with a bit of WD-40, Goo Gone, or even vegetable oil nearby. Wipe your utility knife blade with it every few cuts. This will allow the blade to slice through the mat like butter.
- The Hair Dryer Is Your Best Friend: If you are using a wet saw, have a hair dryer or heat gun (on a low setting) ready. After you cut a tile, wipe it dry with a towel, and then hit it with the hair dryer for 30-60 seconds, paying special attention to the porous, unglazed back. The tile must be 100% bone-dry before you attempt to place it.
- Know The Removal Process (Just In Case): If you absolutely must remove a tile or the mat, do not just rip it off. You will destroy your drywall. The official recommendation is to gently warm the surface with a hair dryer on a low setting. This will soften the adhesive. Then, you can slowly pry the tile and mat off with a putty knife. Be prepared to patch your drywall afterward.
Comparison With Other Brands

Musselbound Vs. Bondera
- Adhesion And Feel: Bondera is another long-standing player in the adhesive mat game. Users report it is also extremely sticky, offering that same “one-and-done” permanent placement as MusselBound. It is also a roll-based product, making it very similar in application.
- Limitations: The biggest difference I found in my research is that Bondera often has a stated tile size limitation, with some versions recommending it only for wall tiles up to 6×6 inches. MusselBound, on the other hand, is rated for tiles up to 7 lbs per square foot, which covers most standard tiles, including 12x12s. For this reason, MusselBound feels a bit more versatile.
- Reputation: Bondera has been around for a very long time, with some users reporting successful backsplash installations that have held up for over 15 years. This gives it a strong track record of durability, which is very reassuring.
Musselbound Vs. Simplemat
- Product Format: This is the most obvious difference. MusselBound comes in a large, 15-square-foot roll. SimpleMat, which is often found at Home Depot, typically comes in smaller, pre-cut sheets, like 9×18 inches. For a small, simple backsplash, the roll might be faster. For a complex area with lots of outlets, the smaller sheets might be easier to cut and fit, resulting in less waste.
- The “Open Time” Factor: This is a crucial difference. MusselBound’s instructions urge you to grout within 24 hours of setting the tile. SimpleMat’s marketing, however, highlights that its adhesive retains its strength, allowing you to “tile an hour at a time or over several days.” If you are a very slow or nervous DIY-er, this extended “open time” from SimpleMat could be a massive advantage, allowing you to work on your project for 20 minutes a night all week.
- Wet Area Use: Both MusselBound (with its seam tape) and SimpleMat are approved for use on shower and tub walls, making them direct competitors for bathroom remodels as well as kitchens.
Read more: Comparison Of Leatherman Free T2 And Victorinox
Frequently Asked Questions (FAQ)
Yes, absolutely. I was a skeptic, but I am a believer. When installed correctly—which means on a perfectly clean, smooth, and dry wall—these mats create an incredibly strong, durable bond. I and thousands of other DIY-ers have backsplashes that have held up for years without a single loose tile. They work, and they work well.
This is almost certainly a wall preparation issue. The adhesive will fail if the wall is:
Dirty or Greasy: Any kitchen grease or residue will prevent a bond.
Dusty: This is the most common culprit. Any drywall dust, even a fine layer, will stick to the mat instead of the wall.
Wet or Damp: The adhesive is not designed to work on a damp surface.
Heavily Textured: The mat needs a high percentage of surface contact. If you have “orange peel” or “knockdown” texture, the mat is only sticking to the high points and will likely fail. You must sand it smooth first.
No. It is not a temporary product. It is designed to be a permanent replacement for mortar. If you try to remove it, it will almost certainly pull off the paper face of your drywall, and in some cases, chunks of the drywall itself. You should plan on having to do significant drywall patching after removal.
Yes, but with a very important rule. It can be used on shower walls, but you must use MusselBound’s separate Waterproofing Seam Tape over all the mat’s seams. This creates a waterproof barrier. It cannot, under any circumstances, be used on shower floors, ceilings, or in steam rooms.
Conclusion
My final verdict? MusselBound is 100% worth it for the right project. If you are a DIY-er tackling a kitchen backsplash, an accent wall, or a tub surround, and your main fear is the mess and difficulty of mortar, you should buy this product immediately.
The convenience, speed, and cleanliness are game-changers. While it’s more expensive and brutally unforgiving of placement errors, the trade-off is a project you can actually start on Saturday morning and be completely finished with by Saturday afternoon. It’s an amazing, empowering product.
