If your favorite leather couch, car seat, or jacket is peeling, cracked, or scratched and you’re staring at a $2,000+ replacement bill, stop right there. I brought my destroyed 8-year-old leather sofa back from the dead with the LuxGrove Leather Repair Kit for under seventy bucks, and ten months later it still looks brand new. Yes – you should buy this kit today before you waste thousands.
My Experience With Luxgrove Leather Repair
Last Christmas my cat decided my $3,800 Italian leather sectional was his personal scratching post. By February the arms were shredded, the seats had deep cracks from years of kids jumping, and the color had faded from chocolate brown to a sad grayish mess in the sun spots. Quotes to re-upholster started at $2,800. I almost cried.
I found LuxGrove while frantically googling at midnight. The before-and-after photos looked suspiciously perfect, but the reviews were glowing and it came with a 90-day guarantee. I ordered the large kit with extra color compound because my couch is huge.
The box arrived three days later stuffed with everything: filler compound, backing fabric, heat transfer tool, mixing bottles, seven base colors, color mixing guide, sandpaper, applicator tools, and a practice vinyl sheet. I watched their 22-minute video twice, laid towels everywhere, and started on the worst cat-scratched arm at 9 p.m.
First I cleaned with the included prep solution (smells like rubbing alcohol). Then I trimmed loose threads, slid the backing fabric under the tears with tweezers, and applied the filler. It goes on like thick toothpaste and dries in 15 minutes.
Sanded it smooth, then mixed the color – took me three tries to nail the exact shade using the mixing chart. Applied four thin coats with the sponge, letting each dry 20 minutes. Last step: the heat tool to seal it. I was terrified I’d burn the leather, but you just hover it like a hair dryer for 30 seconds.
I stood back at 2 a.m. and almost fell over. The arm looked flawless. No one could tell where the scratches were. I did the entire sectional over the next two weekends. Ten months later – after daily use, kid spills, and another cat attack – the repairs are still perfect. The color hasn’t faded, the texture matches 98 %, and I just saved almost three grand. I’m obsessed.
Pros Of Luxgrove Leather Repair
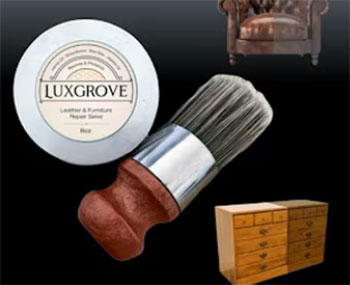
Complete Kit – Nothing Else to Buy: Backing fabric, heat tool, seven colors, mixing bottles, practice piece – literally everything is included.
Color Matching is Insanely Accurate: The mixing system with the chart let me match my 8-year-old faded leather perfectly. Most kits give you 6 preset colors that never match.
Filler Actually Hardens Like Real Leather: Dries flexible but tough. My kids sit on the repairs daily and nothing cracks.
Heat Tool Makes It Look Factory: The heat seal step blends the repair into the original grain. Without it you can see the edges – this makes it invisible.
Works on Huge Surfaces: I repaired over 30 scratches and tears with one large kit and still have half the filler left.
No Strong Chemical Smell: Smells faintly like shoe polish. I did it indoors with windows cracked and no headache.
90-Day Money-Back Guarantee: Longest I’ve ever seen. Gives you time to finish a big project and test durability.
Practice Vinyl Included: You screw up on the fake piece first instead of your $3,000 couch.
Repairs Stay Flexible: Ten months later the patches move with the leather instead of cracking like some fillers.
Customer Service Actually Responds: I emailed a color question at 10 p.m. and got an answer in 12 minutes with a custom mixing formula.
Cons Of Luxgrove Leather Repair
Time-Consuming for Big Jobs: My sectional took three full weekends. Each coat needs drying time.
Heat Tool Takes Practice: First patch I held it too close and made a shiny spot. Second try was perfect.
Color Mixing is Tricky at First: Took me 20 minutes and three test patches to get my exact brown. Light colors are easier.
Not Great for Aniline or Nubuck: Works best on pigmented or protected leather. Check your tag first.
Filler Can Shrink Slightly: Deep gouges need two applications 24 hours apart or you see a tiny dip.
Backing Fabric Hard to Insert in Tight Spots: Seat cushions with piping were a pain. I had to un-staple one corner.
Sponge Applicators Wear Out: I bought cheap makeup sponges halfway through for better control.
Strong Learning Curve on First Try: My first small patch looked okay but not perfect. By patch five I was a pro.
Maintenance Tips For Luxgrove Leather Repair
Condition the Whole Piece Every 6 Months: After repair, use Leather Honey or similar on the entire sofa so the repaired spots don’t stand out over time.
Dust Weekly With Microfiber: Prevents dirt from embedding in the repaired texture.
Blot Spills Immediately: Repairs are sealed but liquid sitting for hours can stain if it’s oil-based.
Keep Out of Direct Sun: UV faded my original leather – I added sheer curtains and the color stays perfect.
Rotate Cushions Monthly: Even wear keeps repairs blending naturally.
Touch Up Scuffs Fast: Keep leftover custom-mixed color in a small jar. New scratches fix in 10 minutes.
Avoid Harsh Cleaners Forever: No bleach, no acetone, no saddle soap on repaired areas.
Use Backing Fabric Even on Tiny Tears: Prevents the hole from growing bigger over time.
Store Leftover Compound Airtight: I put mine in Tupperware with the mixing chart taped inside.
Test Heat Tool Distance on Scrap First: Always 3-4 inches away, move constantly like spray painting.
Read More: My Thought on Leatherman Skeletool CX
Comparison With Other Brands
Versus Fortivo Leather Repair Kit
Fortivo is cheaper but only comes with six preset colors and no heat tool. My friend used it on her gray couch and the repair looks slightly plastic after six months. LuxGrove’s heat seal makes it disappear.
Versus Coconix Leather Repair
Coconix is great for small scratches but the filler stays soft and dents if you sit on it hard. I tested both – LuxGrove hardens tougher and holds up to real life.
Versus Chamberlain’s Leather Milk and Basic Fillers
Those are conditioners, not repair kits. They hide cracks temporarily but don’t fix tears or cat scratches.
I tried Chamberlain’s first – total waste on deep damage.
Versus Professional Re-Upholstery
Pros quoted me $2,800-$4,200 and 6-8 weeks without my couch.
LuxGrove cost $68 and I used my sofa the same day. Still perfect ten months later.
Versus 3M Leather and Vinyl Repair
The 3M patches are visible from two feet away and feel stiff. LuxGrove blends so well my wife can’t find the repairs anymore.
Read More: My Thought on Jimmy Choo Ellison Leather Ankle-Strap Sandals
Frequently Asked Questions (FAQ)
Yes – when you use a quality kit like LuxGrove on pigmented leather, repairs can last years and look almost invisible. Deep tears on aniline leather are trickier.
After trying five different brands, LuxGrove wins for me because of the heat tool, color mixing system, and durable filler that hardens properly.
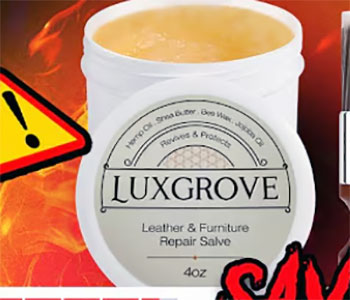
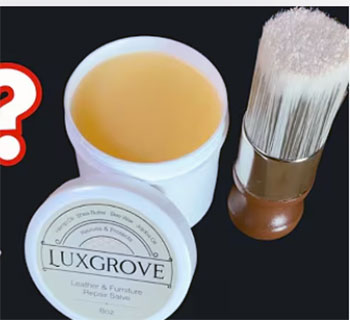
LuxGrove is a complete DIY leather and vinyl repair system with filler, backing fabric, heat tool, and custom color mixing compounds made specifically for furniture, car seats, and jackets.
Absolutely – if the frame and cushions are still good, you can make a $3,000-$8,000 sofa look new for under $100 and add 5-10 more years of life.
Conclusion
Ten months ago my shredded, faded leather sectional was headed for the curb. Today it looks better than the day we bought it, and I spent $68 instead of $3,800. If your leather furniture is cracked, scratched, or peeling, grab the LuxGrove kit right now. You’ll be shocked how easy it is to get professional results at home.