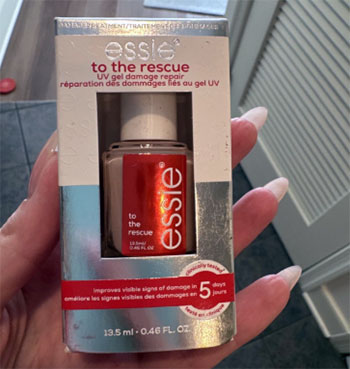
We have all been there—sitting in the salon chair or standing over our bathroom sink, staring in horror at what is left of our natural nails after peeling off a gel manicure. They look like shredded paper, feel sensitive to the touch, and seem ready to snap if you even look at them wrong. In that moment of panic, you scramble for a solution that promises to undo the damage. That is likely when you found Essie To The Rescue, a treatment specifically marketed to heal the sins of UV gel removal.
In this review, I am going to walk you through my personal journey with this “emergency” bottle, analyzing whether it actually heals the nail plate or just covers up the crime scene. We will break down the ingredients, the wear time, and how it compares to the heavy hitters in the nail strengthening game. By the end, you will know if this is the lifeline your nails need or just another clear coat with a catchy name.
My Experience With Essie To The Rescue
I consider myself a bit of a serial offender when it comes to nail health. I love the durability of gel polish, but I lack the patience for proper removal, often leading to me peeling them off while watching TV. The result is always catastrophic: white patches of delamination, ridges that feel like mountains, and tips so flexible they bend backward. After my last “removal session,” my nails were in such a sorry state that even water hurt them. I picked up Essie To The Rescue UV Gel Damage Repair at my local drugstore, drawn in by the specific claim that it targeted exactly what I had done to myself.
The first thing I noticed when I opened the bottle was the consistency.
It is slightly thicker than a standard top coat but not as gloopy as a gel builder.
The brush is the classic wide Essie brush that I absolutely love; it fans out to cover the entire nail bed in one or two swipes, which is crucial when your nails are sensitive and you don’t want to keep dragging bristles over them.
The smell is standard nail polish chemical—not overwhelmingly strong, but definitely present.
I applied two thin coats as directed to my clean, dry, and terrifyingly damaged nails.
Visually, the difference was instant. The product has a subtle, sheer gloss that immediately masked the white, chalky dry spots where the nail layers had peeled away. It didn’t hide everything, but it made my nails look “healthy-ish” and intentional, rather than neglected. It dries down to a hard, shiny finish that feels protective. It felt like I had put a rigid plastic shield over my weak nails, which was exactly the sensation I was craving. The sensitivity to hot water vanished almost immediately because the nail plate was sealed.
However, the “5-day” claim was a bit of a stretch for me during the first week. Because my nails were so flexible and damaged, the polish started to crack at the stress points (the sides of the nails) by day three. It didn’t chip off in chunks, but I could see hairline fractures in the coating. I touched it up with another layer, which smoothed it back out.
By the end of the second week of using it exclusively (removing and reapplying every 5 days), I did notice a tangible difference. The new growth at the cuticle was coming in strong, obviously, but the damaged lengths felt less brittle. They weren’t magically fused back together—once a nail is split, it’s split—but the product prevented them from snagging and peeling further. It acted as a cast that allowed the damage to grow out safely without catching on my clothes. It isn’t a miracle cure that reverses damage overnight, but as a protective barrier to bridge the gap between “disaster” and “healed,” it performed significantly better than a standard clear coat.
Read More: My Thoughts On Gitti Nail Polish
Pros Of Essie To The Rescue
When dealing with compromised nails, you need a product that balances immediate cosmetic improvement with actual structural support. After testing this treatment thoroughly, several key advantages make it a standout choice for the post-gel recovery phase.
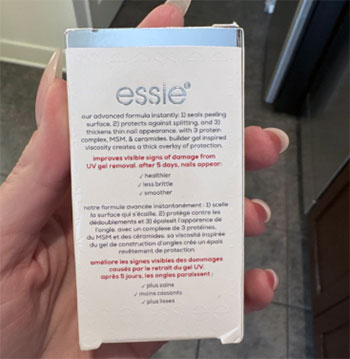
- Specialized Formulation For Peeling Layers: Unlike generic hardeners that just make the nail stiff (and sometimes brittle), this formula uses MSM and ceramides to target the specific type of damage caused by gels. Gel removal often rips up layers of keratin, leaving the nail surface fuzzy and peeling. Essie To The Rescue acts almost like a spackle or a laminating sheet, adhering the lifting layers back down to the main nail plate. This sealing effect is crucial because it stops the peel from travelling further down the nail bed, effectively hitting the “pause” button on the damage. You get a smoother surface instantly, which prevents you from picking at the flakes and making it worse.
- Instant Cosmetic “Glow” Effect: One of the hardest parts of rehabbing nails is walking around with ugly, battered hands for weeks. This product has a very subtle optical brightening effect—it is clear, but it reflects light in a way that blurs imperfections. It hides the chalky white spots and ridges that scream “I just ripped off my acrylics.” For professionals who cannot show up to work with ragged nails but also cannot wear color polish while healing, this provides a polished, “your nails but better” aesthetic. It looks like a high-end clear manicure rather than a medicinal treatment.
- Versatility As A Base Coat Or Standalone: You are not locked into a “treatment only” prison while using this. While it works best alone to monitor progress, it functions exceptionally well as a ridge-filling base coat under standard nail polish. If you have an event and need to wear color, you can put this on first to protect the damaged nail from staining and further drying agents. It grips color polish well, extending the life of your manicure because it provides a smooth, even canvas on top of your uneven natural nail. This flexibility means you don’t have to throw the bottle away once your nails are healed; you can keep using it as your standard base.
- Wide Fan Brush For Gentle Application: We cannot overstate the importance of the applicator when your nails are tender. The signature Essie wide brush is designed to minimize the number of strokes needed to coat the nail. This reduces the friction and drag on a sensitive, thinned-out nail plate. You can essentially “float” the product onto the nail without pressing down, which is a relief when your nail beds feel bruised or raw. The quick, one-swipe application also reduces the chance of streaks, ensuring an even layer of protection every time.
Cons Of Essie To The Rescue
While it is an effective band-aid for damaged nails, it is not a magic wand, and there are limitations to what it can achieve. It is important to have realistic expectations before you rely on this to fix severe damage.
- Longevity Issues On Flexible Nails: The irony of nail strengtheners is that they often chip fastest on the nails that need them most. Because damaged nails are thin and bend easily, the rigid coating of Essie To The Rescue can crack or lift when the nail flexes. Users with paper-thin nails may find that the product chips at the free edge within two or three days, requiring frequent touch-ups. It is not a 7-day wear polish if your foundation is unstable; you will likely need to reapply it mid-week to maintain the seal. This can be frustrating if you were hoping for a “set it and forget it” weekly treatment.
- It Is A Protective Shield, Not A Biological Cure: It is critical to understand that nails are dead tissue; you cannot technically “heal” them like skin. Essie To The Rescue glues the damage down and reinforces the structure, but it does not biologically regenerate the keratin. Once you remove the product with acetone, the damage underneath is still there until it grows out. Some users feel disappointed when they take the polish off after a week and see the peeling is still present. It requires patience; the product protects the nail while it grows out, but it doesn’t erase the past damage permanently.
- Confusion With Product Line Variations: Essie has a very crowded shelf of “care” products, including “Hard to Resist,” “Treat Love & Color,” “Strong Start,” and “All In One.” “To The Rescue” is specifically for UV damage, but the packaging looks nearly identical to the others. This makes it very easy to buy the wrong bottle by mistake if you aren’t reading the fine print. Furthermore, finding this specific version in stock can sometimes be harder than finding the standard “Hard to Resist” pink bottle, leading to frustration for loyal users.
- Requires Acetone For Removal: To take this treatment off and start fresh, you need to use nail polish remover, which is inherently drying. If your nails are already damaged from chemicals, soaking them in remover every 5 days can feel counterproductive. You have to be extremely diligent about rehydrating your nails with oil immediately after removal. Unlike a serum that absorbs and disappears, this is a lacquer that requires chemical stripping, which is a harsh cycle for severely compromised nails.
Maintenance Tips For Essie To The Rescue
To transform this product from a simple clear coat into a powerful recovery tool, you need to use it as part of a broader nail health regimen. Here is how to maximize its effectiveness.
- The “Wrap The Tip” Technique Is Mandatory: Since the tips of your nails are the oldest and most damaged part, they are the first to chip and peel. When applying Essie To The Rescue, you must drag the brush horizontally across the very front edge of your nail (capping the free edge). This seals the layers of the nail tip between two layers of polish, preventing water from entering the microscopic cracks. This mechanical seal is what stops the peeling from catching on fabrics and tearing further. Do this for every single coat you apply, not just the final one.
- Rehydrate Before You Recoat: The polish seals moisture out as well as in, so you need to make sure your nails aren’t dry before you paint them. Between applications, when your nails are bare, spend 10 minutes massaging a high-quality jojoba-based cuticle oil into the nail plate. Let it absorb fully, then wash your hands with soap and water to remove the oily residue before applying the treatment. This ensures that the nail plate underneath the “shield” is conditioned and flexible, reducing the chance of the nail snapping under the hard polish.
- Adopt A “Touch-Up” Strategy: Do not wait for the polish to chip completely before fixing it. If you see wear at the tips on day 3, apply a thin layer of the product right over the existing coat. This adds fresh reinforcement to the weak spots and extends the life of the manicure. However, avoid doing this more than twice, as the layers will get too thick and start to peel off in a sheet. After 5 to 7 days, remove everything completely and start fresh to inspect the health of the nail underneath.
- Avoid Water Exposure For The First Hour: While the polish might feel dry to the touch in minutes, it takes longer to fully cure and bond to the nail. Avoid washing dishes, showering, or washing your hands in hot water for at least an hour after application. Water can expand the nail plate, causing the still-curing polish to lift or bubble. Apply the treatment while watching a movie or before bed to ensure it has ample time to set without moisture interference.
Comparison with Other Brands
The nail care aisle is overwhelming, with every brand promising steel-hard nails. Here is how Essie To The Rescue compares to the three main competitors you are likely considering.
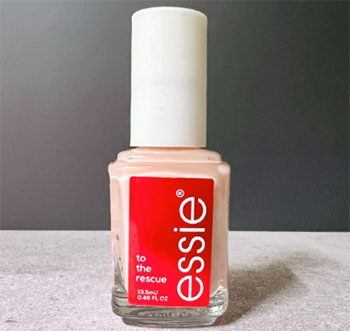
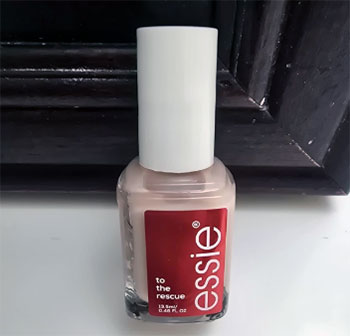
- Essie Hard To Resist Advanced (Pink Bottle): This is the sibling product that often confuses buyers. Comparison: Hard To Resist is a general strengthener for weak nails that bend, using MSM to bond the nail layers. To The Rescue is specifically tweaked for the texture of post-gel damage (peeling and roughness). Hard To Resist has a distinct pink or purple tint (glow), whereas To The Rescue is more milky/clear. If your nails are just naturally soft, go with Hard To Resist. If your nails are shredded and peeling from a bad salon visit, To The Rescue offers better sealing properties for that specific flakey texture.
- OPI Nail Envy (Original Formula): The legendary heavyweight champion of nail strengtheners. Comparison: OPI Nail Envy is significantly more expensive than Essie. It is a much more aggressive treatment, often containing wheat protein and calcium to make nails very hard. However, OPI can sometimes make nails too hard, causing them to snap rather than bend if used for too long. Essie To The Rescue feels more flexible and conditioning. OPI is a “boot camp” for nails; Essie is “rehab.” If you need serious, industrial-strength hardening, OPI wins, but for sensitive, thinned-out nails, Essie is gentler and less likely to cause brittleness.
- Sally Hansen Repair + Rescue: The direct drugstore competitor with a very similar name. Comparison: Sally Hansen is usually cheaper and widely available. Their formula tends to be thicker and glossier, almost looking like a gel top coat on its own. However, many users find that Sally Hansen peels off in sheets after a few days, whereas Essie tends to wear down more gracefully. Essie’s brush is superior for precise application. Sally Hansen is great if you want a thick, visible layer of protection immediately, but Essie feels like it integrates better with the natural nail for longer wear.
Also Read: My Thoughts On Nail Aid Keratin 3 Day Growth
Frequently Asked Questions (FAQ)
You will see a visual improvement immediately upon application because it seals the peeling layers. However, for structural improvement where the nail feels stronger without polish, it typically takes 1 to 2 weeks of consistent use. The full benefit is realized as the damaged nail grows out, which can take 3 to 6 months for a full replacement of the nail plate.
Yes, absolutely. It functions excellently as a base coat. You can apply two coats of To The Rescue to treat the nail, and then layer your favorite color polish on top. Just be aware that adding more layers might make the manicure thicker and potentially more prone to chipping if your nails are very flexible.
No, Essie To The Rescue is formulated without formaldehyde, DBP, or Toluene. It is considered a “3-free” or often “8-free” product (depending on the specific batch regulation), making it safer for long-term use compared to old-school hardeners that used formaldehyde to cross-link keratin. This makes it less likely to cause allergic reactions or yellowing of the nail.
The recommended usage is to apply two coats to start, and then you can either add a coat if needed or leave it for 5 days. After 5 days, remove the product with remover and start the process again. Do not apply it every single day on top of old layers, as this will build up too much thickness and lead to peeling.
Conclusion
Essie To The Rescue UV Gel Damage Repair is exactly what it claims to be: a specialized emergency kit for nails that have been traumatized by gel polish. It bridges the gap between the salon disaster and the return of your healthy natural nails. While it won’t magically fuse a split nail back together, it provides the essential “shield” needed to prevent further damage while you grow them out.
If you are currently staring at peeling, paper-thin nails and regretting your life choices, this bottle is worth every penny of the $13 investment. It masks the ugliness immediately and protects the vulnerability underneath. For chronic gel users, keeping a bottle of this in your drawer is not just a luxury; it is a necessary insurance policy for the health of your hands.