When I was building my baby registry, I thought a diaper pail was just a glorified trash can. I was wrong. It’s a sentinel, a guardian against the olfactory assault that is a mountain of dirty diapers. The two biggest names in the game are Diaper Genie and Munchkin. I’ve used both, and I’m here to give you the real-world breakdown. My goal isn’t just to list features, but to explain how those features feel at 3 AM when you’re on autopilot. Let’s figure out which one truly deserves that prime spot in your nursery.
A Brief Comparison Table: Diaper Genie Vs. Munchkin
| Feature | Diaper Genie (Complete Model) | Munchkin (Step Model) |
| Odor Control System | Double “Air-Tite” clamp; 7-layer refill film; Carbon filter (in lid) | Twisting mechanism; 7-layer refill film; Arm & Hammer baking soda puck |
| Operation | Foot pedal (fully hands-free) | Foot pedal (lid opens, may require pushing diaper in) |
| Refill System | Continuous ring (cut and tie) | Continuous ring or “Snap, Seal & Toss” bags |
| Ongoing Costs | Proprietary refill rings; Carbon filters | Proprietary refill rings/bags; Baking soda pucks |
| Primary Material | Plastic | Plastic |
| Capacity (Newborn) | ~36-40 diapers | ~30 diapers |
My Experience With Diaper Genie
My journey with the Diaper Genie Complete began like most: it was a baby shower gift.
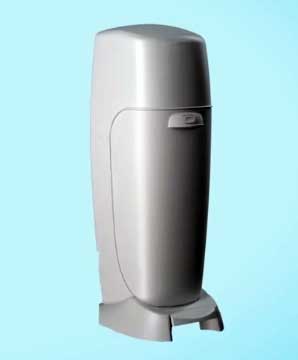
It was the brand I knew. Setting it up was simple enough, a tall, slender white tube that tucked neatly beside the changing table.
For the first few weeks of newborn diapers, it was a champion.
The foot pedal was the star. Holding a squirming baby, I could tap the pedal, the top would pop open, and I’d drop the tiny diaper into the “jaws” of the clamp.
Another tap, and it was gone. The “whoosh” of the clamp closing felt so final and secure.
The real test came when we introduced solids. This is where the Diaper Genie’s odor control system was put on full display. The combination of the multi-layer bag and the carbon filter did an admirable job. I’d say it contained 95% of the smell, 95% of the time. The 5% it didn’t contain was when the pail was opened. A slight puff of… evidence… would escape. The other time was the dreaded “change day.” Emptying the Diaper Genie is an event. You open the whole front of the pail, pull down the plastic “sausage” of diapers, find the built-in cutter, slice the bag, and then tie a knot in the bottom of the remaining film. Then you have to tie a knot in the top of the full bag you just removed. It’s not pleasant, and it’s definitely not odorless. I felt like I was wrestling an odorous serpent. But for daily use, its hands-free convenience was undeniable.
Pros Of Diaper Genie
- Truly Hands-Free Operation: This is, in my opinion, the Diaper Genie’s single greatest advantage, especially with the Complete model. When you have a baby in one arm and a soiled diaper in the other, the last thing you want to do is use your clean hand to push, twist, or slide anything. The foot pedal on the Genie opens the lid and the internal clamps simultaneously.1 You just drop the diaper in, release the pedal, and the clamps and lid close, sealing the odor away. This one-step, no-touch disposal is a massive sanity-saver during chaotic changes. You don’t have to bend over, you don’t have to touch the pail, and the process takes less than a second. It feels polished and well-engineered in that specific moment.
- Excellent Odor Containment (When Closed): The Diaper Genie system is built around a double-barrier.2 First, you have the 7-layer refill film, which is designed to be non-porous to odor molecules.3 Second, you have the “Air-Tite” clamps. These spring-loaded jaws are the gatekeepers. When the lid is closed, these clamps form a tight seal around the bag, effectively trapping everything below.4 This is supplemented by a carbon filter pod that sits in the lid, which helps neutralize any odors that might try to escape when the lid is opened.5 For day-to-day nursery freshness, this system works exceptionally well. You can stand right next to a full Diaper Genie and, most of the time, you won’t smell a thing.
- Tall, Slim Design: Nurseries are often tight on space.6 The Diaper Genie has a vertical, narrow footprint. It’s designed to fit neatly into small spaces, like the gap between a changing table and a wall, without becoming a tripping hazard. This tall design also means you don’t have to bend over as much to drop the diaper in, which, while minor, is a nice ergonomic touch when you’re already hunched over a changing table. It’s less obtrusive than some of the bulkier, wider pails on the market and feels more like a small appliance than a bulky trash bin.
- High-Capacity Refill Rings: This is a pro with a small catch, but it’s still a pro. A single refill ring (not a single bag) boasts that it can hold up to 270 newborn diapers. This means you aren’t constantly swapping out the entire refill cartridge. You install one ring, and it can last for weeks, or even a couple of months, depending on your baby. You just keep pulling more of the continuous bag film down as you need it. This “set it and forget it” aspect of the refill cartridge is very convenient, as you’re not running to the store for bags every week.
Cons Of Diaper Genie
- The Bag Changing Process Is Unpleasant: This is the Genie’s biggest flaw. When the pail is full, you have to perform a small, messy operation. You open the front of the unit, which exposes the long “diaper sausage” you’ve been creating. You have to pull the bag down, use the built-in child-proof cutter to slice the film, and then tie a knot in the top of the full bag. Then, you must pull down the fresh film from the ring and tie a new knot in the bottom to create the next bag. This entire process is hands-on and completely exposes you to the concentrated odor of several dozen diapers. It’s the one moment the entire odor-lock system fails, and it’s a big one. It’s smelly, and tying that bottom knot can be awkward.
- High Long-Term Refill Cost: The Diaper Genie is a classic “razor and blades” business model. The pail itself is often reasonably priced, sometimes even on sale, but the proprietary 7-layer refill rings are where they make their money. These rings are significantly more expensive than standard trash bags.7 While you can find third-party, generic-brand refills that are cheaper, they often don’t have the same 7-layer film or odor-control efficacy. This locks you into a specific, costly ecosystem for as long as you use the pail. The cost of these refills, plus the periodic replacement of the carbon filters, adds up to a surprisingly high long-term investment.
- Bag Wastage And Inefficiency: The “cut and tie” system, while allowing you to change the bag at any time, is inherently wasteful. It’s very difficult to judge exactly where to cut the bag to maximize its capacity without risking a tear or making it too heavy. More importantly, every single bag you create requires you to use several inches of the film just to tie the knot at the bottom. This wasted film adds up over the life of the refill ring, meaning you aren’t really getting the full value of the plastic you paid for. It’s a small annoyance that compounds over time.
- Potential For Mechanical Failure: The hands-free system is its best pro, but it’s also a potential point of failure. The foot pedal mechanism and the internal spring-loaded clamps are made of plastic. Over time, or with rough use (like stepping too hard or forcing the lid closed), these parts can wear out, break, or misalign. I’ve heard from many parents (and experienced myself) that the foot pedal can lose its connection or the clamps can get stuck, requiring you to manually push them open or closed, which completely defeats the purpose of the hands-free design.
Maintenance Tips For Diaper Genie
- Deodorize The Pail Itself: The plastic body of the Diaper Genie is porous, and over time, it will absorb diaper odors.8 Even after you remove a full bag, the empty pail itself can stink. To combat this, you need to do more than just change the bag. Every time you empty the pail, I recommend sprinkling a generous amount of baking soda directly into the bottom of the pail before you pull down the new bag. This will sit at the bottom of the unit and absorb ambient odors that get trapped outside the bag. For a deeper clean, you can also place a “puck” style deodorizer (like those for a fridge or a cat litter box) at the bottom.
- Perform A Regular Deep Clean: About once a month, or immediately after any catastrophic bag leak, you need to give the pail a full bath. Take it outside or into a bathtub. First, wipe down the entire interior and exterior with a disinfectant wipe, paying close attention to the clamp mechanism and the lid. Then, wash the entire unit, inside and out, with a solution of hot water and soap. For really stubborn, absorbed odors, a wash with a 1:1 solution of white vinegar and water is extremely effective. The most important step: let it air dry completely, preferably in direct sunlight. The UV rays from the sun are a natural disinfectant and deodorizer. Trapping moisture inside will only create a new, mildewy smell.
- Replace The Carbon Filter Regularly: That little carbon filter in the lid isn’t just for show. It’s actively absorbing odor molecules.9 But like any filter, it has a limited capacity. The manufacturer suggests replacing it every 30 days, but I found that stretching it to 60-90 days was fine. However, you must replace it. When it’s saturated, it stops working, and you’ll notice a significant increase in the “puff” of smell every time you open the lid. This is a recurring cost, but it’s essential to maintaining the system’s peak performance. Don’t forget this step; it’s a key part of the odor-control promise.
- Manage The Bag Cutter: The built-in bag cutter is a tiny, shielded razor blade.10 It’s child-proof, which is great, but it’s also prone to getting… gunked up. It’s in the direct line of fire. After you cut a bag, it’s a good idea to take a disinfectant wipe and carefully clean the cutter blade and its housing. A buildup of grime can make it harder to slice the bag film, leading to tearing, stretching, or just a frustrating experience. A clean cutter makes for a clean cut, which makes the dreaded bag-changing process just a little bit smoother and faster.
Read more: My Thoughts on CCIYU Auto Parts
Comparison With Other Brands
- Versus Ubbi: This is the most common showdown. The Ubbi’s primary advantage is its construction and bag-compatibility.11 It’s made of powder-coated steel, which is not porous like the Diaper Genie’s plastic. This means the Ubbi pail itself will not absorb odors over time, which is a massive long-term win. The Ubbi’s other huge selling point is that it uses any standard kitchen trash bag.12 This completely eliminates the high-cost, proprietary refill ecosystem that plagues the Diaper Genie. However, the Diaper Genie wins on convenience. The Ubbi has a sliding lid that is not hands-free.13 You must use a hand to slide it open, and when you do, it releases a significant puff of air from the inside. The Diaper Genie’s foot-pedal-and-clamp system is far superior for daily, hands-free operation and for trapping odors during disposal.14 It’s a trade-off: long-term cost and pail-freshness (Ubbi) vs. daily convenience (Genie).
- Versus Dekor: The Dekor (Plus or Classic models) is a closer competitor. Like the Genie, it’s typically made of plastic and uses a foot pedal for hands-free opening.15 It also uses a continuous bag liner system that requires cutting and tying. The key difference is the trap door. The Dekor has a spring-loaded trap door that you push the diaper through, whereas the Genie has the internal clamps. Many users find the Dekor’s trap door less effective at sealing odors than the Genie’s “Air-Tite” clamps.16 However, Dekor has a major advantage in versatility: it’s one of the few pails on the market that offers both disposable and reusable cloth diaper pail liners, making it a favorite for cloth-diapering families.17 The Diaper Genie is strictly for disposable diapers.18
- Versus Angelcare: The Angelcare system is another plastic, proprietary-bag-based pail. Its odor-control mechanism is different. When you drop a diaper in, you often have to push it through a set of internal clamps (similar to the Genie, but often manually operated, not foot-pedal-activated). The main distinction is in the bag system. Angelcare’s refills are also a continuous ring, but the system is designed to drop and “sausage” each diaper more individually. The Diaper Genie essentially creates one giant sausage, while the Angelcare system can feel like it’s creating a link of smaller sausages. In practice, the Diaper Genie Complete’s foot pedal operation is generally considered more convenient than most Angelcare models. The odor control is often rated as comparable, with both relying heavily on the quality of their multi-layer plastic film to do the heavy lifting.
My Experience With Munchkin
After about a year, the foot pedal on my Diaper Genie started to stick. I decided it was time to see if the grass was greener.
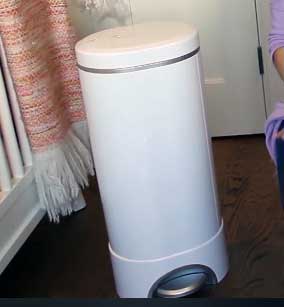
I bought the Munchkin Step pail, drawn in by its promise of a “twist” seal and the power of Arm & Hammer.
The setup was just as easy, but the mechanism felt… different. More complex.
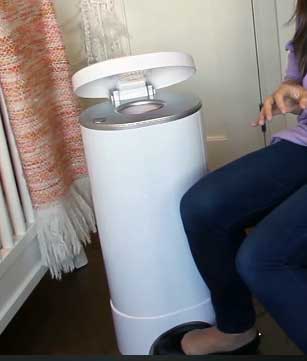
It has the foot pedal, which I loved, but it also has the baking soda “puck” that you snap into the lid.
When you step on the pedal, the lid opens. You drop the diaper in, and when you release the pedal, the lid closes, and the entire internal mechanism twists, sealing the bag shut like a bread tie.19 This twisting action was a game-changer. It felt mechanically superior to the Genie’s simple clamp. The combination of the twist-seal and the baking soda puck was formidable. The odor control was, without a doubt, better. The nursery just felt fresher.
The trade-off was the disposal process. While the foot pedal opens the lid, it doesn’t open the mechanism. You often have to gently push the diaper past the twisted “neck” of the bag. It’s a tiny, extra step, but it means it isn’t truly hands-free. The bag changing day was also different. The Munchkin refills come in two styles: a continuous ring (like the Genie) or an individual “Snap, Seal & Toss” bag.
0 I preferred the snap-on bags. When it was full, you just opened the unit, snapped the bag closed, and tossed it. No cutting, no tying, no “diaper sausage” wrestling. It was cleaner, faster, and infinitely less disgusting. The downside? The bags hold less, so you change them more often. And the baking soda puck is another recurring cost.
Pros Of Munchkin
- Superior Dual Odor Control System: This is the Munchkin’s crown jewel. It attacks odors on two fronts. First, the mechanical “twist-seal” system. When you close the lid, the inside of the pail rotates, tightly twisting the bag closed.21 This physically chokes off the top of the bag, creating a seal that is, in my experience, more effective than the Genie’s simple clamp. Second, it incorporates the Arm & Hammer baking soda “puck.”22 This puck clicks into the lid and continuously absorbs and neutralizes odors inside the pail.23 This dual-action—physically trapping the smell and chemically neutralizing it—results in a nursery that stays noticeably fresher. Even when opening the lid, the puff of air is less potent because the puck has been working on the ambient air inside.
- Cleaner Bag Changing (With Snap, Seal & Toss): While Munchkin offers a ring-refill option, its “Snap, Seal & Toss” refill bags are a significant quality-of-life improvement.24 These are individual bags. When the pail is full, you open the unit, and the bag has a plastic ring at the top. You just snap the ring shut, which seals the bag completely. Then you just lift it out and toss it. There is no cutting. There is no tying. There is no wrestling with a long, heavy “diaper sausage.” This method keeps your hands much cleaner and exposes you to the concentrated odors for a much shorter, more contained period. It makes a universally hated chore significantly more tolerable.
- Built-In Child Lock: This is a small feature that becomes a huge deal once your baby becomes a toddler. Toddlers are fascinated by buttons, pedals, and lids. The Munchkin Step includes a simple, one-touch button on the front of the pail that locks the lid. This prevents curious little ones from opening the pail and “exploring” the contents. The Diaper Genie, with its enticing foot pedal, essentially becomes a fun toy for a 1-year-old. The Munchkin’s lock provides genuine peace of mind, knowing that the pail’s contents will stay inside the pail, no matter how much your toddler pounds on it.
- Step Pedal Convenience: Like the Genie, the Munchkin Step features a foot pedal.25 This is a must-have feature for any diaper pail. It allows you to open the lid with your foot, keeping both hands free to manage the baby and the dirty diaper.26 While it’s not fully hands-free (as you sometimes have to nudge the diaper in), the foot pedal for the lid opening is a critical component for hygiene and convenience.27 It just makes the entire process feel cleaner and more efficient than a pail that requires you to use your hand to open a lid.
Cons Of Munchkin
- Not Truly Hands-Free Disposal: This is the most common complaint and the biggest trade-off compared to the Genie. The foot pedal only opens the lid. It does not open the internal twisting mechanism (because it’s already twisted shut from the last diaper). To dispose of a new diaper, you have to use your hand (or the diaper itself) to push it down through the twisted bag opening.28 This is a very minor inconvenience, but it’s an extra step. With a particularly messy diaper, it’s a step that can feel a bit gross. It breaks the “no-touch” workflow that the Diaper Genie Complete perfects.
- Proprietary Refills And Deodorizers: The Munchkin also operates on the “razor and blades” model, but it’s a two-part system. You are locked into buying their specific refills, whether you choose the rings or the Snap, Seal & Toss bags. These are, again, more expensive than standard trash bags. But on top of that, you also have the recurring cost of the Arm & Hammer baking soda pucks. The manufacturer recommends replacing these every 60-90 days to maintain peak odor-fighting performance.29 While you could technically skip the puck, doing so would compromise the dual-action system that makes the pail so effective in the first place. This means you have two separate, proprietary consumables to keep buying.
- Artificial Scent: This is a deal-breaker for some parents. Both the refill bags and the baking soda pucks are heavily scented with a lavender fragrance.30 The intention is to mask odors, but it can be overwhelming. If you are sensitive to artificial fragrances or are trying to maintain a scent-free nursery, this is a major drawback. The lavender smell is strong and ever-present. Some reports have also raised concerns about artificial fragrances as potential endocrine disruptors, which can make health-conscious parents hesitant.31 You cannot buy an unscented first-party version.
- Smaller Capacity (With Snap Bags): If you opt for the more convenient “Snap, Seal & Toss” bags, you will be emptying the pail more frequently. These individual bags have a smaller capacity than the giant, continuous bag you can create with the Diaper Genie. The Munchkin Step pail itself holds around 30 newborn diapers, while the Genie Complete can push 40. This means more frequent trips to the outside trash. This isn’t a huge deal for some, but if your goal is to change the bag as infrequently as possible, the Genie has a slight edge in total capacity per change.
Read more: Comparison Of Leatherman Free T2 And Victorinox
Maintenance Tips For Munchkin
- Clean The Twisting Mechanism: The core of the Munchkin’s power is its twisting function.32 This area—the parts that grip and twist the bag—is the most likely to get soiled. During your regular cleaning, you must pay special attention to this mechanism. Use a disinfecting wipe or a cloth with a vinegar solution to thoroughly wipe down all the moving parts of the twister. If this area gets sticky or grimy, it can fail to twist the bag completely, which compromises the entire odor seal. A clean mechanism is a functional mechanism. Make this your top priority when cleaning the pail.
- Replace The Puck On A Schedule: The baking soda puck is a consumable, not a permanent feature. It works by actively absorbing odors and releasing its own scent. Over time, the baking soda becomes saturated and the scent fades. Munchkin recommends replacing it every 60 to 90 days.33 I suggest setting a recurring reminder on your phone. It’s easy to forget, but you will notice a difference in odor control when it’s past its prime. To maximize its life, make sure the lid of the pail stays closed as much as possible, so the puck is only working on the air inside the pail, not the air in the whole room.
- Deodorize The Bottom (Even With The Puck): The puck is in the lid, but gravity is still a thing. Moisture and particles can settle at the very bottom of the pail, underneath the bag. Just like with the Genie, the plastic body of the Munchkin can absorb smells over time. When you change the bag, sprinkle a layer of additional unscented baking soda at the bottom of the pail barrel. This creates a secondary, passive odor-absorbing layer that catches anything the puck in the lid might miss. It’s a cheap, effective “belt and suspenders” approach to keeping the pail itself from turning into a source of odor.
- Full Pail “Bath” Protocol: Just like the Genie, the Munchkin needs a deep clean every month or so. Because of the twisting mechanism, I would avoid fully submerging the top lid portion in water. Instead, take the pail apart as much as you can. Wash the main barrel (the bottom part) in a bathtub with hot, soapy water. For the top lid and mechanism, use a cloth soaked in a vinegar-water solution or a good disinfectant spray. Wipe down every single surface, inside and out. Let every piece air dry completely in the sun, if possible, before reassembling. This prevents mildew and ensures you’ve reset the pail back to “factory neutral.”
Comparison With Other Brands
- Versus Ubbi: The Munchkin Step and Ubbi often appeal to different parents. The Ubbi’s main advantages are its non-porous steel body and its use of standard kitchen trash bags, making it the long-term budget winner.34 The Munchkin, however, is the clear winner on active odor control.35 The Ubbi’s sliding lid does nothing to contain the odor while it’s open, leading to a blast of stink.36 The Munchkin’s twist-seal and baking soda puck are far more technologically advanced at keeping the nursery fresh 24/7.37 It’s a choice between long-term cost savings (Ubbi) and superior, active odor management (Munchkin). Both are plastic (Munchkin) vs. steel (Ubbi) as well, which is a big factor for those trying to avoid plastic absorbing smells.
- Versus Diaper Genie: This is the main event. The Munchkin’s dual odor-control system (twist + puck) is, in my direct experience, more effective than the Genie’s clamp-and-filter system. The “Snap, Seal & Toss” bag change is also objectively cleaner and less disgusting than the Genie’s “cut-and-tie” sausage wrestling. However, the Diaper Genie wins on pure convenience. Its one-step, truly hands-free foot pedal operation is faster and cleaner in the moment of disposal.38 The Munchkin’s “push-past-the-twist” is a small but noticeable extra step. It comes down to this: Do you want a faster, hands-free disposal (Genie) or a fresher room and a cleaner bag change (Munchkin)?
- Versus Dekor: The Munchkin is generally considered a more premium and effective product than the Dekor. Both have a foot pedal, but the Munchkin’s twist-seal mechanism is vastly superior to the Dekor’s simple spring-loaded trap door for odor control. Baby Gear Lab, for instance, consistently rates the Munchkin at the top for odor control, while the Dekor is rated as one of the worst.39 The Dekor’s only real advantage over the Munchkin is its compatibility with cloth diaper liners. If you are exclusively using disposable diapers, the Munchkin is the clear winner in this matchup for keeping the stink contained.
Frequently Asked Questions (FAQ)
No, not officially. However, some third-party brands (like Target’s up&up) and even some of Munchkin’s own “Nursery Fresh” refills are designed to be compatible with both pails.45 You must read the packaging carefully.
Yes, depending on your priority. For pure odor control, I and many others find the Munchkin Step to be superior. For long-term cost and to avoid plastic-absorbing smells, many people prefer the Ubbi, which is steel and uses standard kitchen trash bags.
The Munchkin Step is frequently rated as the best diaper pail for all-around performance, especially for its unmatched odor control.47 The Ubbi Steel pail is a very close second, prized for its eco-friendly (non-proprietary bag) and durable (steel) design.
It is recommended that you replace the Arm & Hammer baking soda puck every 60 to 90 days to ensure it remains effective at absorbing and neutralizing odors.
Conclusion
After living with both pails, my verdict is in. For me, the Munchkin Step is the better diaper pail.
The Diaper Genie is a classic, and its one-touch, truly hands-free disposal is something I missed every single day I used the Munchkin. But that’s where its advantages ended. The nursery simply smelled better with the Munchkin. Its dual-action twisting seal and baking soda puck system is a one-two punch that the Genie’s simple clamp can’t match.49
Even more importantly, the dreaded bag-changing day became a non-event. Switching from wrestling the Diaper Genie’s “diaper sausage” to the simple, clean “Snap, Seal & Toss” of the Munchkin was a massive quality-of-life upgrade.
So, here is my final advice to you. If your only priority is the fastest, most convenient, 100% hands-free daily disposal, the Diaper Genie Complete is your champion. But if you want the pail that does the best job at the main task—locking away odors—and provides a far more pleasant and hygienic cleaning experience, you should absolutely choose the Munchkin.